Testing doesn't have to be boring, and it certainly doesn't need to be difficult...
Appium Inspector is a GUI tool that simplifies the process of writing and debugging tests for mobile applications on real devices. How? Built on top of the Appium test automation framework, it provides a user-friendly interface for automating a new app or feature in your native application.
Appium Inspector integrated support in the Sauce Labs Real Device Cloud utilizes the latest Appium version and eliminates cumbersome workflows to help you inspect Appium locators in real time for native applications, and select specific elements to debug issues in your test automation scripts promptly.
Get testing in just a few steps:
Once your app is running on your selected real device, access the "Developer Options" from the Live Test interface to locate and select the "Appium Inspector" tab.
Click on the "Start Inspection" button. A message indicating "We’re creating your Appium session." will then appear. This process may take a few seconds
Et voila! Appium Inspector interface will be visible, allowing you to start interacting with your application's UI elements, with the actual Appium server running.
Key benefits for QA, QE, and Appium test authors
Achieve faster test authoring for Appium tests with the seamless integration of Appium Inspector, empowering teams to inspect UI elements within the application with a single click.
Facilitate faster debugging of Appium test automation script issues by leveraging the Appium Inspector integration embedded within the comprehensive and broader real-time debugging tool set available in Sauce Labs.
Improve productivity by streamlining the workflows for inspecting elements and eliminating the need for any additional configuration and tool installation.
Enhance test efficiency with a superior user experience featuring direct Appium Inspector session opening from failed tests, one-click app source copying and downloading, and easily validating hybrid/web (iOS) views for native apps.
Approaches to using Appium Inspector
With the Appium Inspector active, you’ll now have access to the app's UI as it appears in the live session, as well as the ability to interact with and inspect UI elements' properties through a few specific approaches:
Option 1: Direct interaction in the Inspect View for debugging
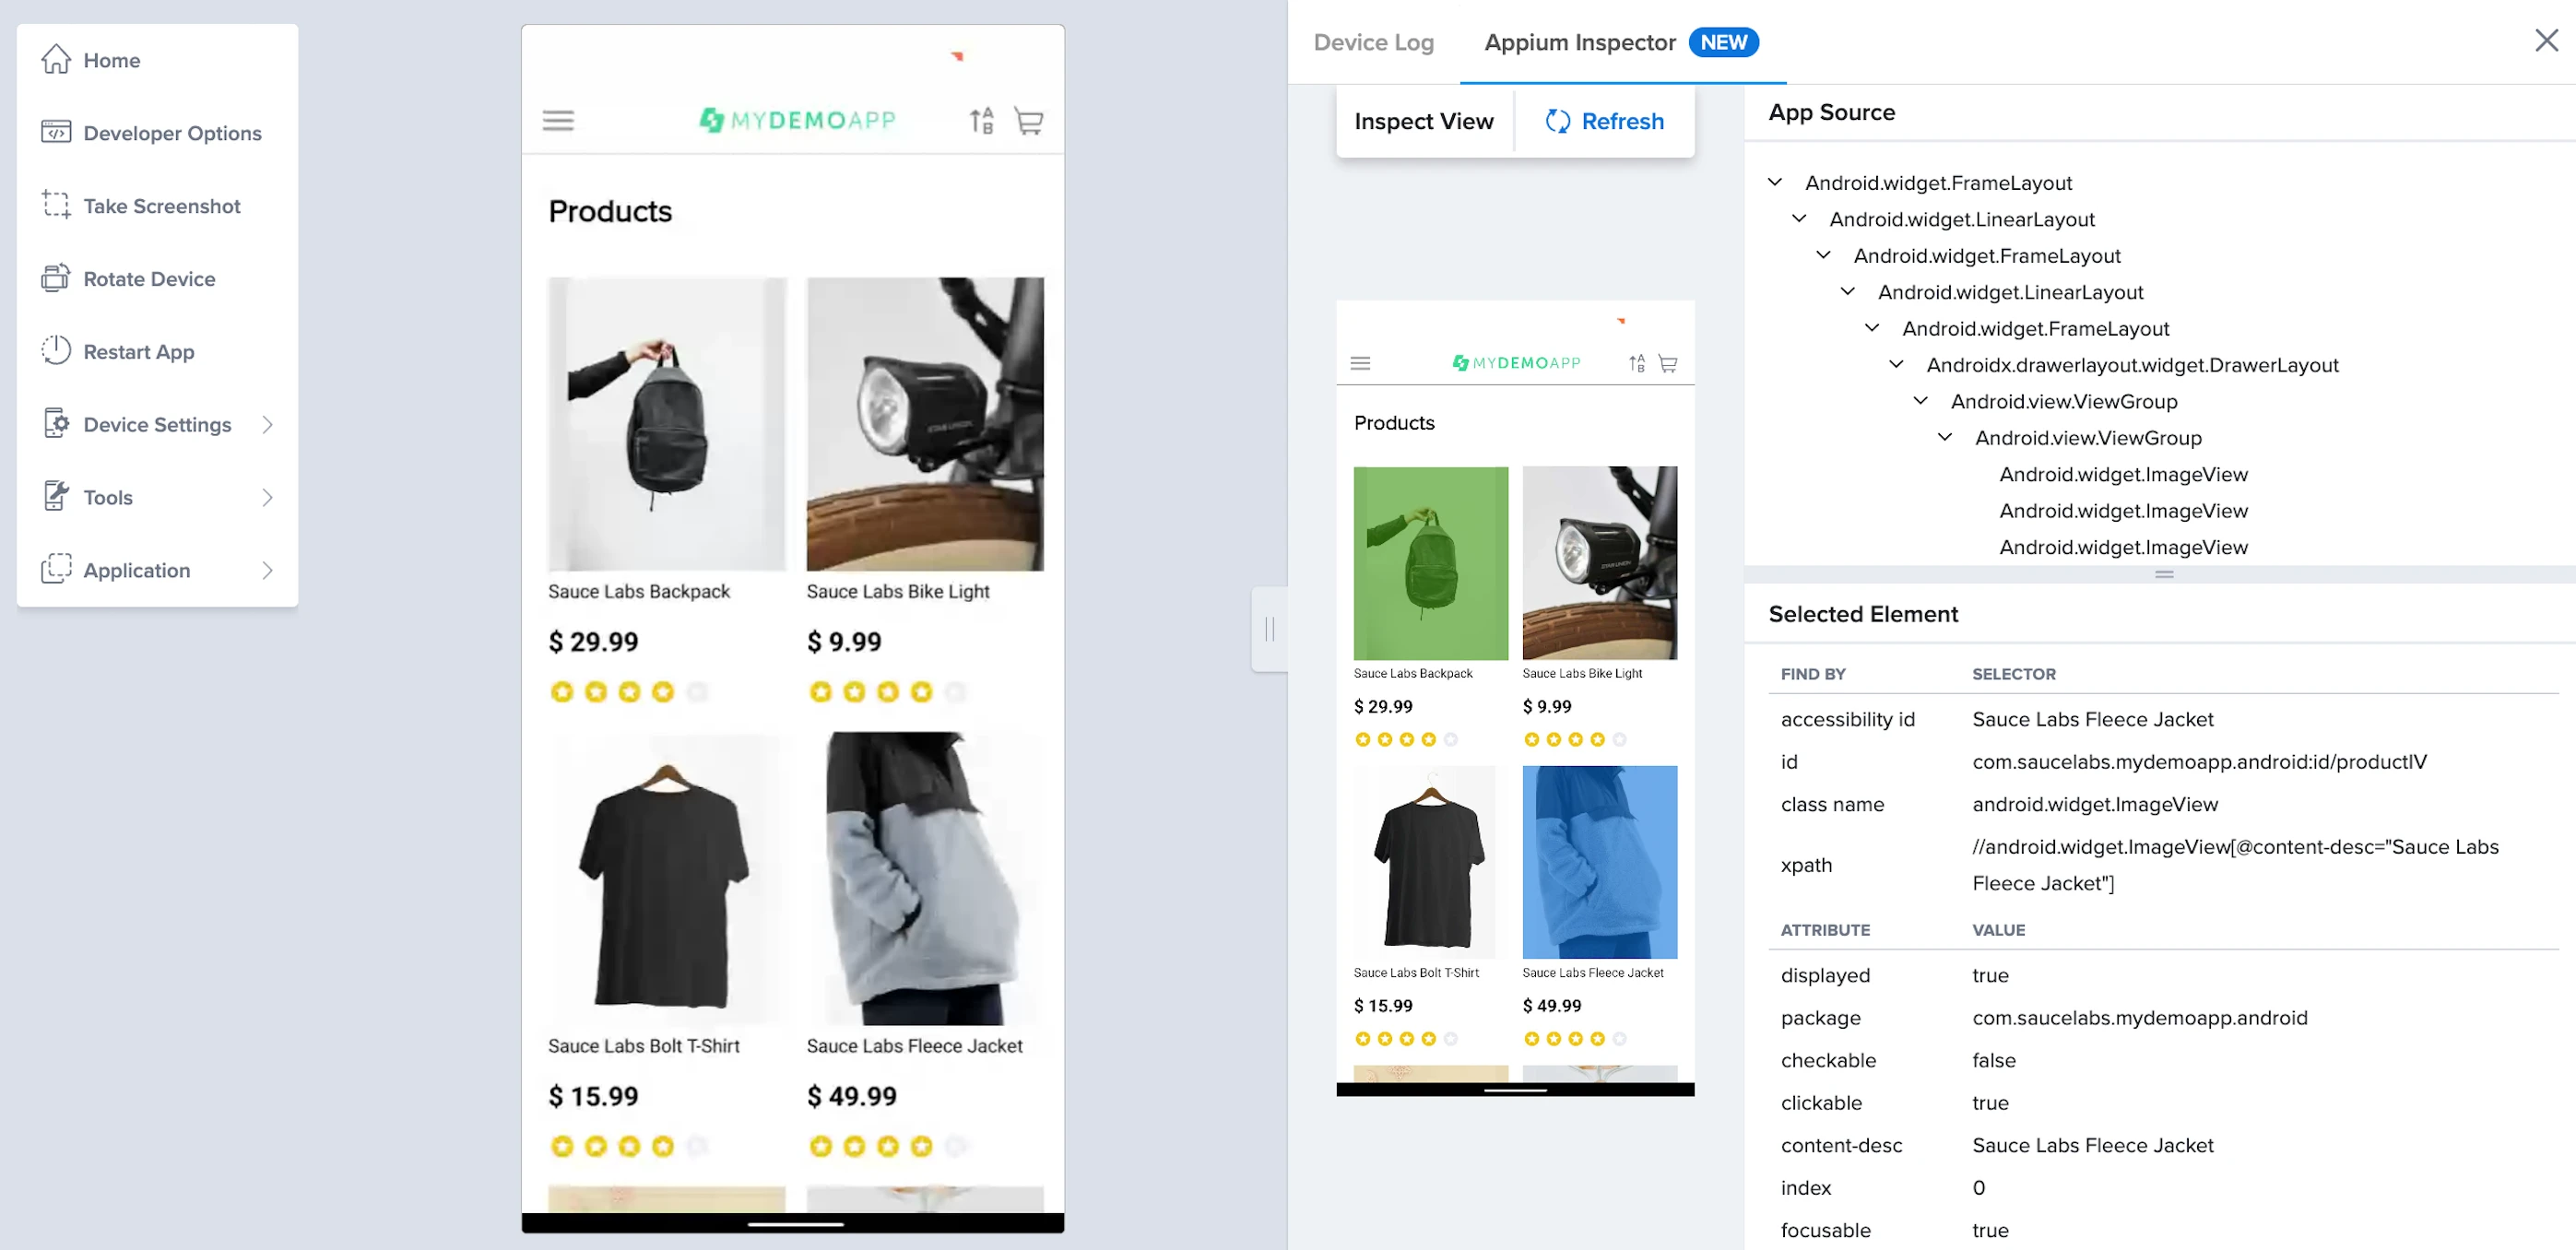
Think of the Inspect View as a snapshot of your application. Inspect elements of your App by hovering, highlighting, or clicking on the desired UI element in the Inspect view. The selected element will be highlighted with a green background and displayed in the "App Source" and under the "Selected Element" view, showcasing the element's attributes.
Option 2: Using the App Source View
The App Source View provides a more detailed look into the hierarchy of your native application in an XML tree structure. Hover over elements to see their equivalent highlighted in the Inspect View. You can also click on an element to view its properties which will appear under the "Selected Element" view.
In both options, the "Selected Element" view will reveal the properties of the chosen element. The "Find By" column will list the locators useful for identifying the element in your tests. Additional attributes, such as width and height, are displayed in the "Attribute" column, providing a comprehensive understanding of the element's characteristics.
Navigating and refreshing the UI View
When you move to a different screen within your app, or scroll through the current screen, the UI elements visible in the Appium Inspector don’t automatically update to reflect the new view. Refreshing the UI view in the Appium Inspector is essential to working with the most current representation of your app's UI.
To ensure you are inspecting the current state of your app's UI, follow these steps:
Perform the desired navigation or scrolling action within your app's UI in the live session.
Now, click on the "Refresh" button in the Appium Inspector to force the Inspector to fetch and display the updated view of your app's UI.
With the UI view refreshed, you can now continue to interact with and inspect the UI elements that are currently visible.
To finish inspecting and interacting with your app, close it by clicking the "X" button. After closing the Appium Inspector, you can either continue with your live testing or end the session based on your needs.
Best Practices for Using Appium Inspector on Sauce Labs
Here are a few ways to maximize Appium Inspector's utility in Sauce Real Device Cloud:
Utilize Locators for more efficient test automation
Use Appium Inspector to find and determine the best locators for UI elements within your mobile application. Identifying robust locators is critical for developing stable and reliable automated tests.
Incorporating these locators into your automation test scripts will significantly reduce flakiness and improve test reliability.
Example - Verifying the Sorting options screen in the Sauce Demo app.
The below example demonstrates the process of using Appium Inspector to identify locators for UI elements within the Sauce Demo app and applying these locators in Java test code to verify the sorting options screen is shown.
You can find a comprehensive view of how this fits into a larger test case using the full code.
Step 1: Use the Appium Inspector to find the locator of the Sorting Options button on your app's main screen.
Step 2: Copy the identified locator into your Java test code. The accessibility ID of the locator for the sorting options button is "Shows current sorting order and displays available sorting options". Thus, the code to define this locator and perform a click action would look like this:
By sortButtonLocator = AppiumBy.accessibilityId("Shows current sorting order and displays available sorting options");
driver.findElement(sortButtonLocator).click();
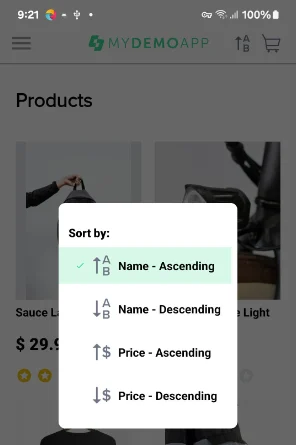
Step 3: From the live session, click on the sorting options button to navigate to the sorting options screen.
Step 4: From the Appium Inspector, click the Refresh button to update and get the new locators for the current screen view.
Step 5: Use the Appium Inspector to find the locator for the "sort by:" title on the sorting options screen.
Step 6: Copy the identified locator into your Java test code. The ID identifier of the locator for the sorting options screen title is "com.saucelabs.mydemoapp.android:id/sortTV,". Thus, the code to define this locator and add an assertion to verify that the sorting modal is displayed on the screen:
By sortModalLocator = By.id("com.saucelabs.mydemoapp.android:id/sortTV");
//Verify that the sort modal is displayed on the screen
assertThat(isDisplayed(sortModalLocator, 5)).as("Verify sort modal is displayed").isTrue();;
This step-by-step example showcases the workflow from using Appium Inspector for locating and interacting with UI elements, to implementing these locators in automation test scripts. It highlights the importance of precise locator identification and verification in developing stable and reliable automated tests for mobile applications.
Explore UI Structure for improved understanding of element hierarchy
Having the ability to visualize and understand the hierarchy of the UI elements is crucial for writing tests that interact with the UI elements accurately and effectively.
Generate more detailed accessibility insights
Take greater advantage of more thorough accessibility insights to verify if elements are visible and enabled to create more inclusive apps.
The insights gained can guide improvements in your app’s usability by ensuring elements are properly labeled and accessible to all users, including those with disabilities.
Get started
The beauty of Appium Inspector integrated support is that it simplifies how you inspect and interact with UI elements, eliminating the need for any additional configuration, installation, and security. You can begin an Appium Inspector session directly from a ‘Failed Automated’ Appium test to easily find elements by ID/Xpath/AccessibilityID, and copy or download App Source with a single click!
Also, accelerate debugging for Appium test script issues with Appium Inspector’s embedded integration into the broader real-time debugging tool set offered in Sauce Labs.
You’re on your way to a more exciting testing experience. Start your journey with our Appium Inspector technical guide.


